Meetings OverviewUpdated 8 months ago
Meetings play a crucial role in every event, especially in networking events, as they are the core of building meaningful business relationships and interactions between participants. As an event organizer, it is essential you understand how to configure your event's meetings and access a comprehensive overview of all the meetings.
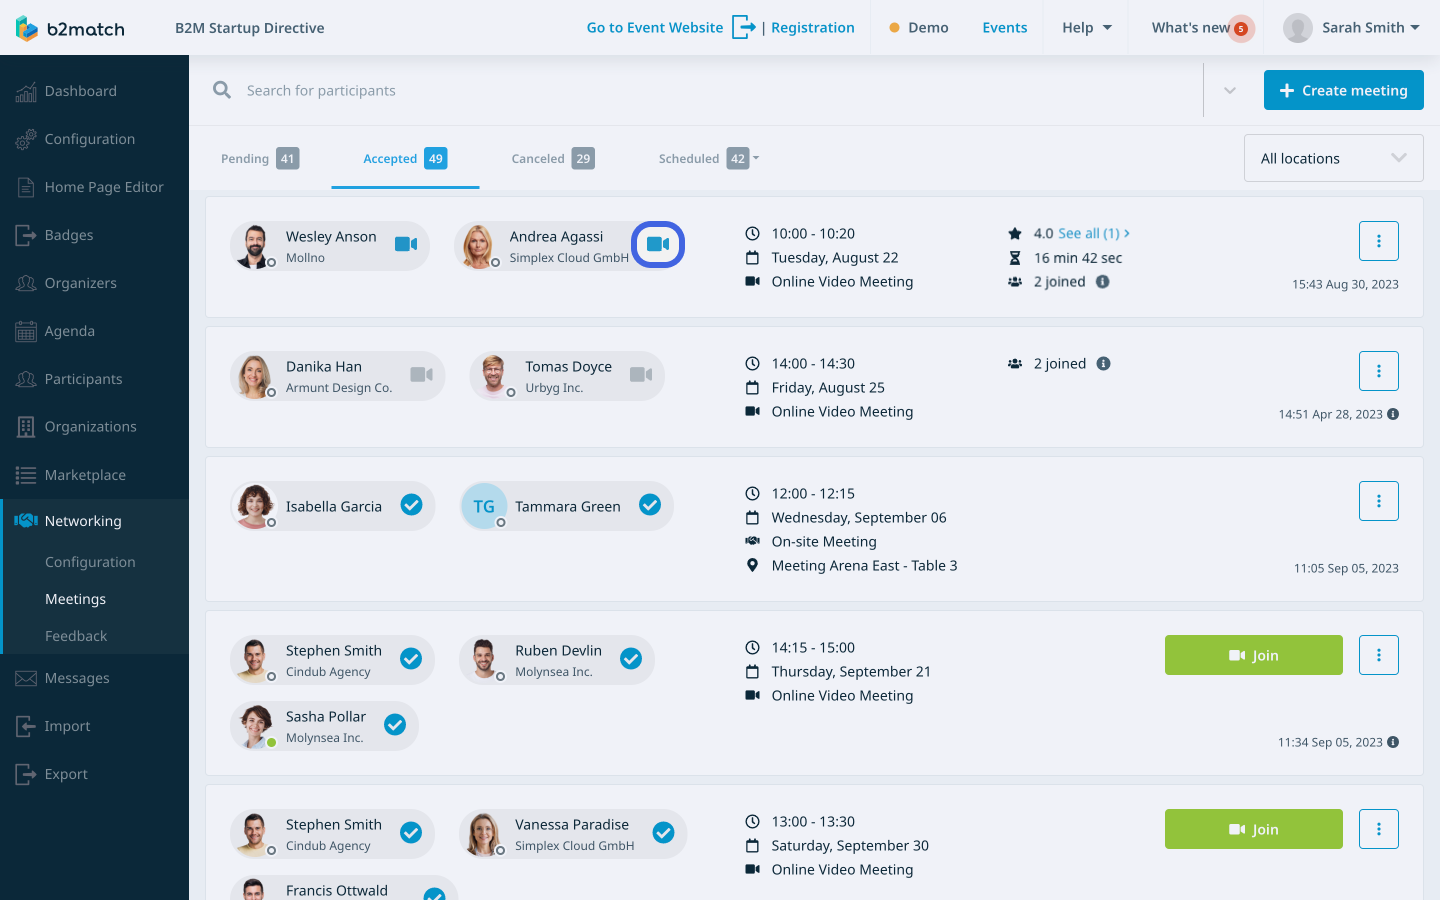
Where can I access meetings?
To access the Meetings page, first navigate to the left sidebar of the Organizer's tool and click on Networking.
This will open the Networking drop-down menu. From here, select Meetings. This will redirect you to the Meetings page.
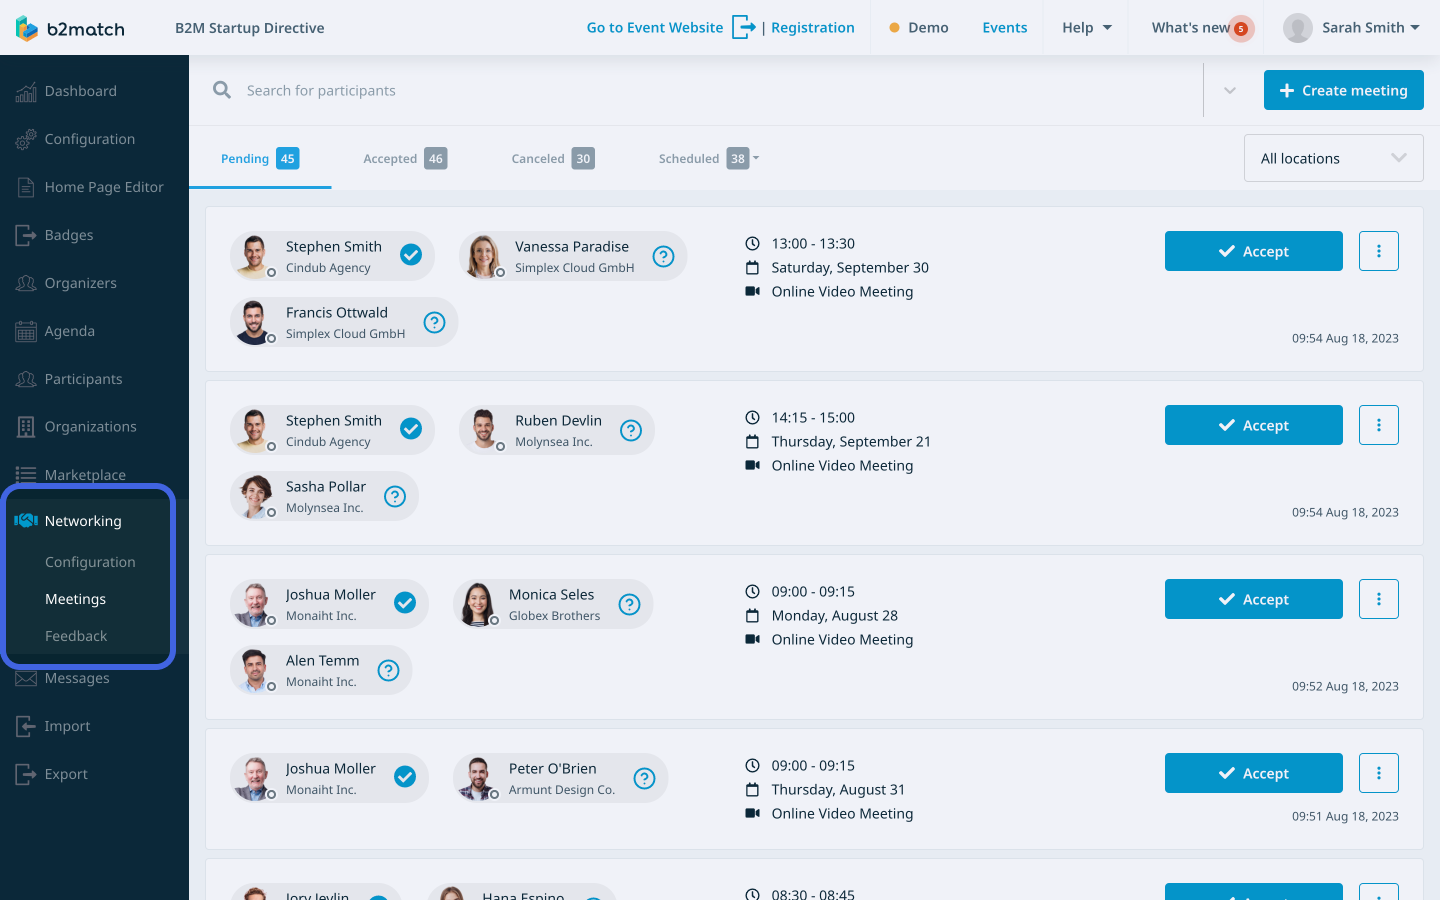
Here, you can view details about each meeting held during the event and also create or edit meetings.
What does the Meetings page look like?
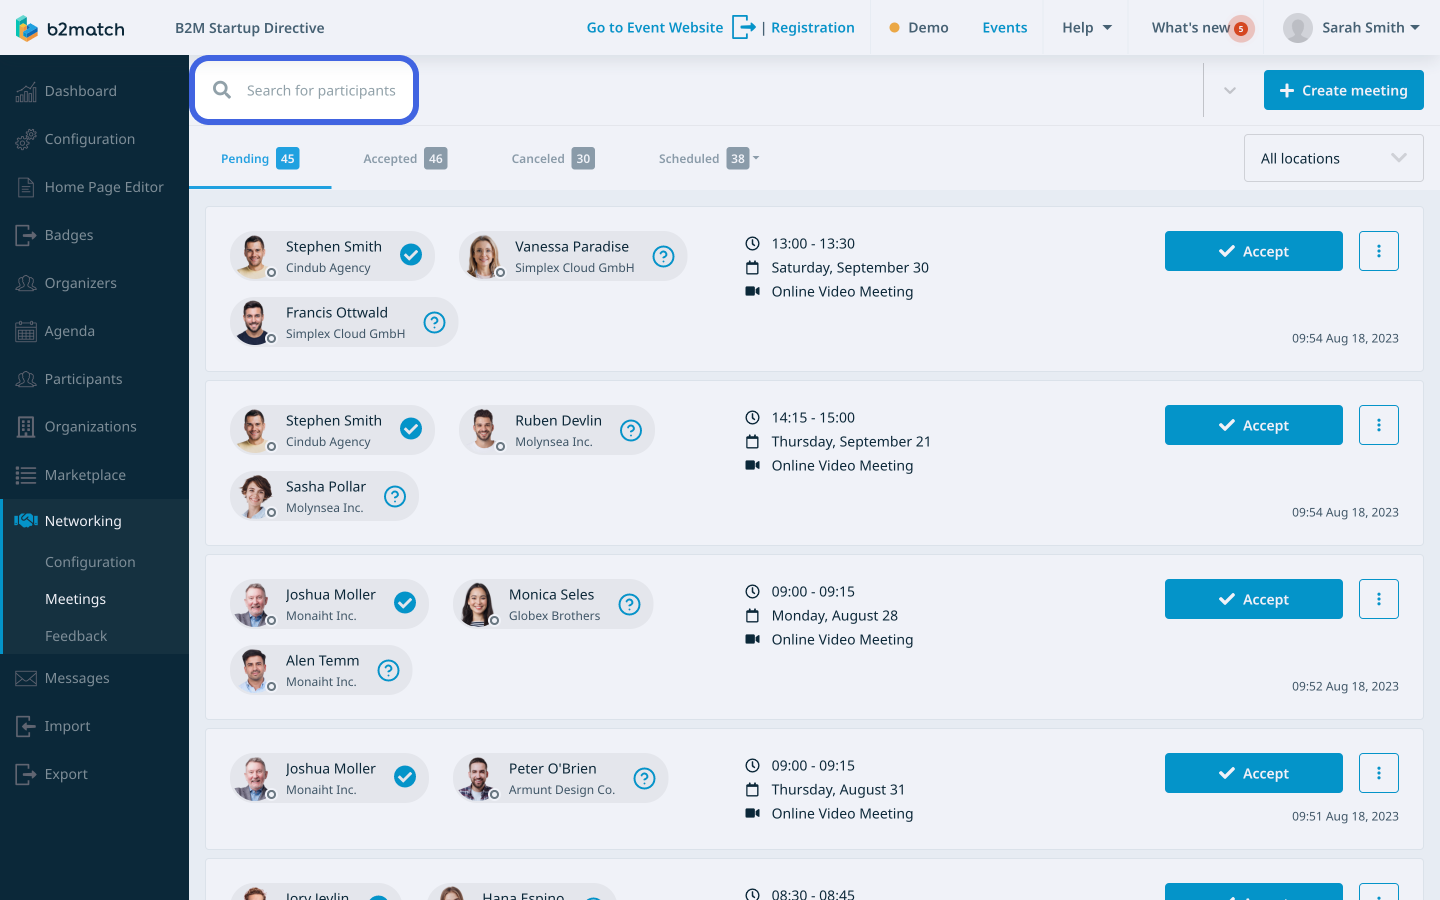
At the top of the page, you will notice the search bar. The search bar allows you to search for meetings by typing in the name of the involved participant or organization.
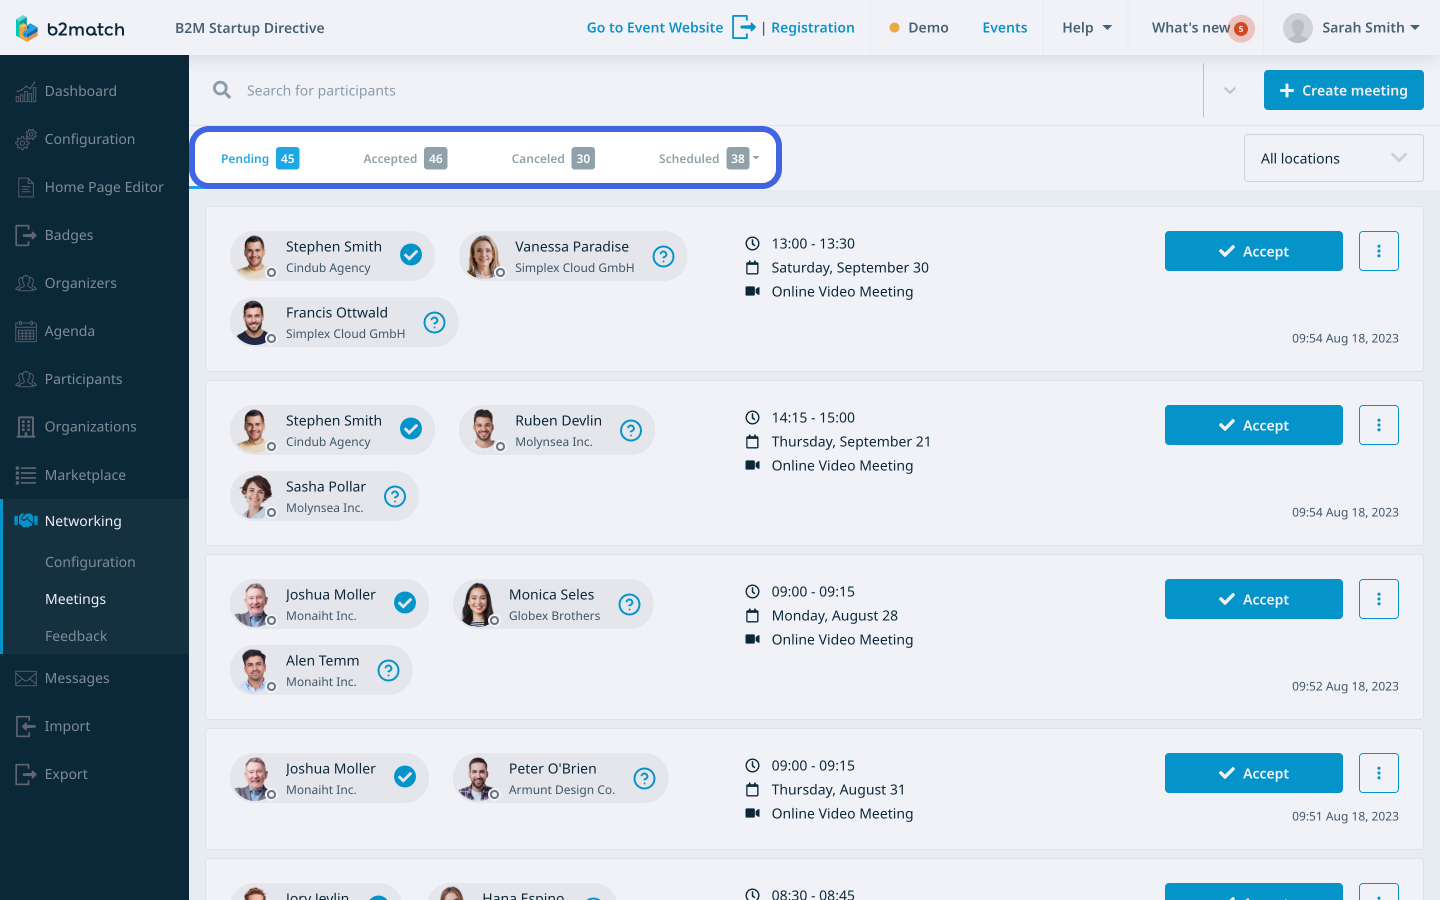
Below the search bar, you'll find four different tabs that categorize meetings:
Pending Tab
The Pending tab displays all pending meetings that are yet to be accepted.
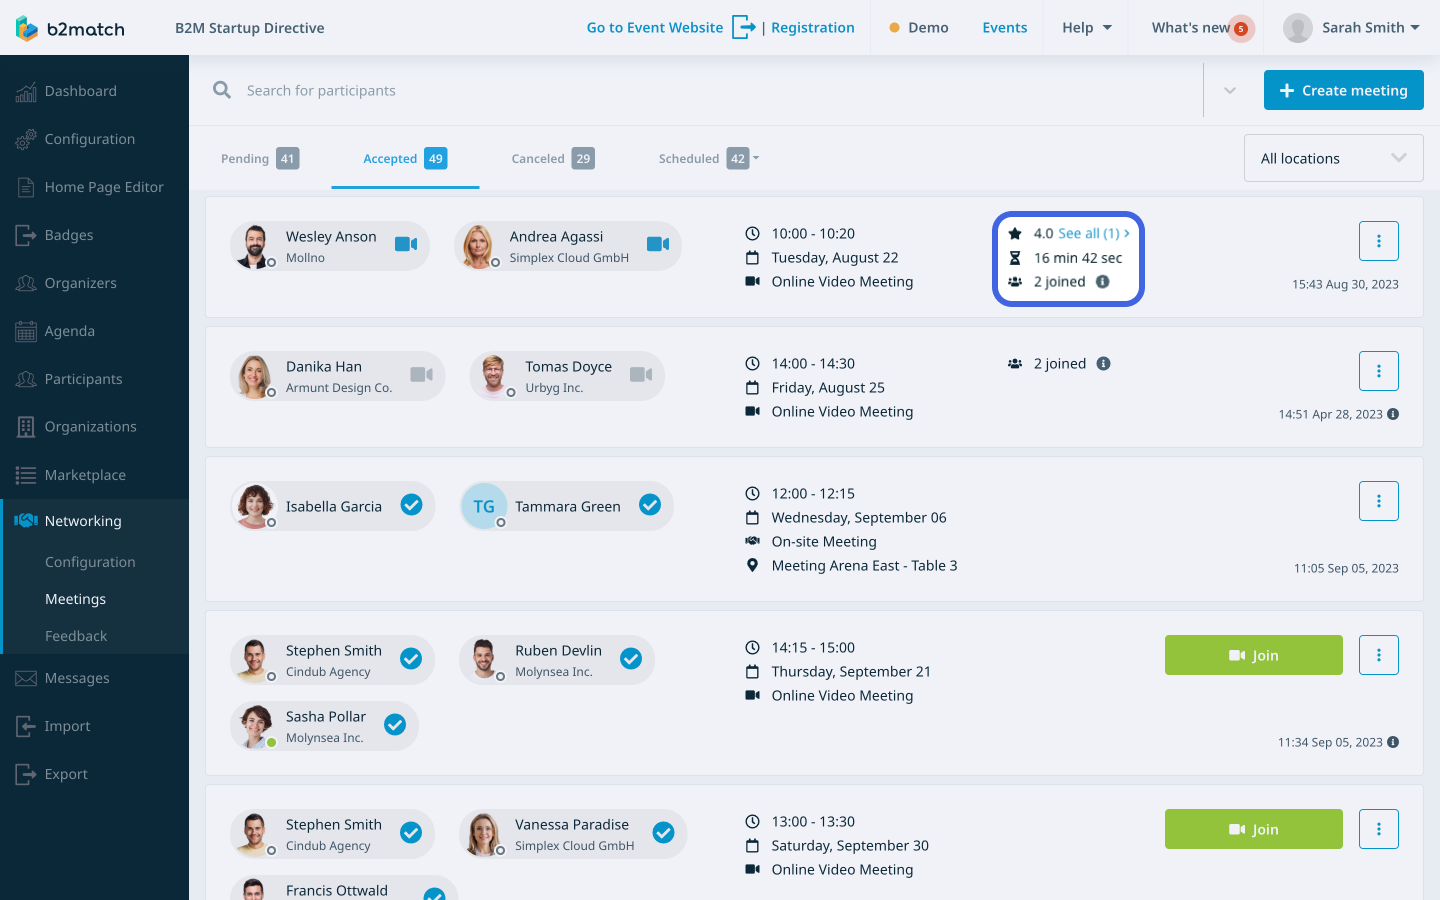
Accepted Tab
In the Accepted tab, you can find a comprehensive list of accepted meetings. It includes both scheduled meetings with confirmed times and locations, as well as unscheduled meetings that have been accepted by the host and at least one guest.
Canceled Tab
The Canceled tab displays all meetings that have been canceled. A meeting will be classified as canceled if either the host cancels it or, in the case of a meeting with only two participants (host and guest), the guest cancels it. However, if there are at least two people who have accepted the meeting, it will not be shown in this tab.
Scheduled Tab
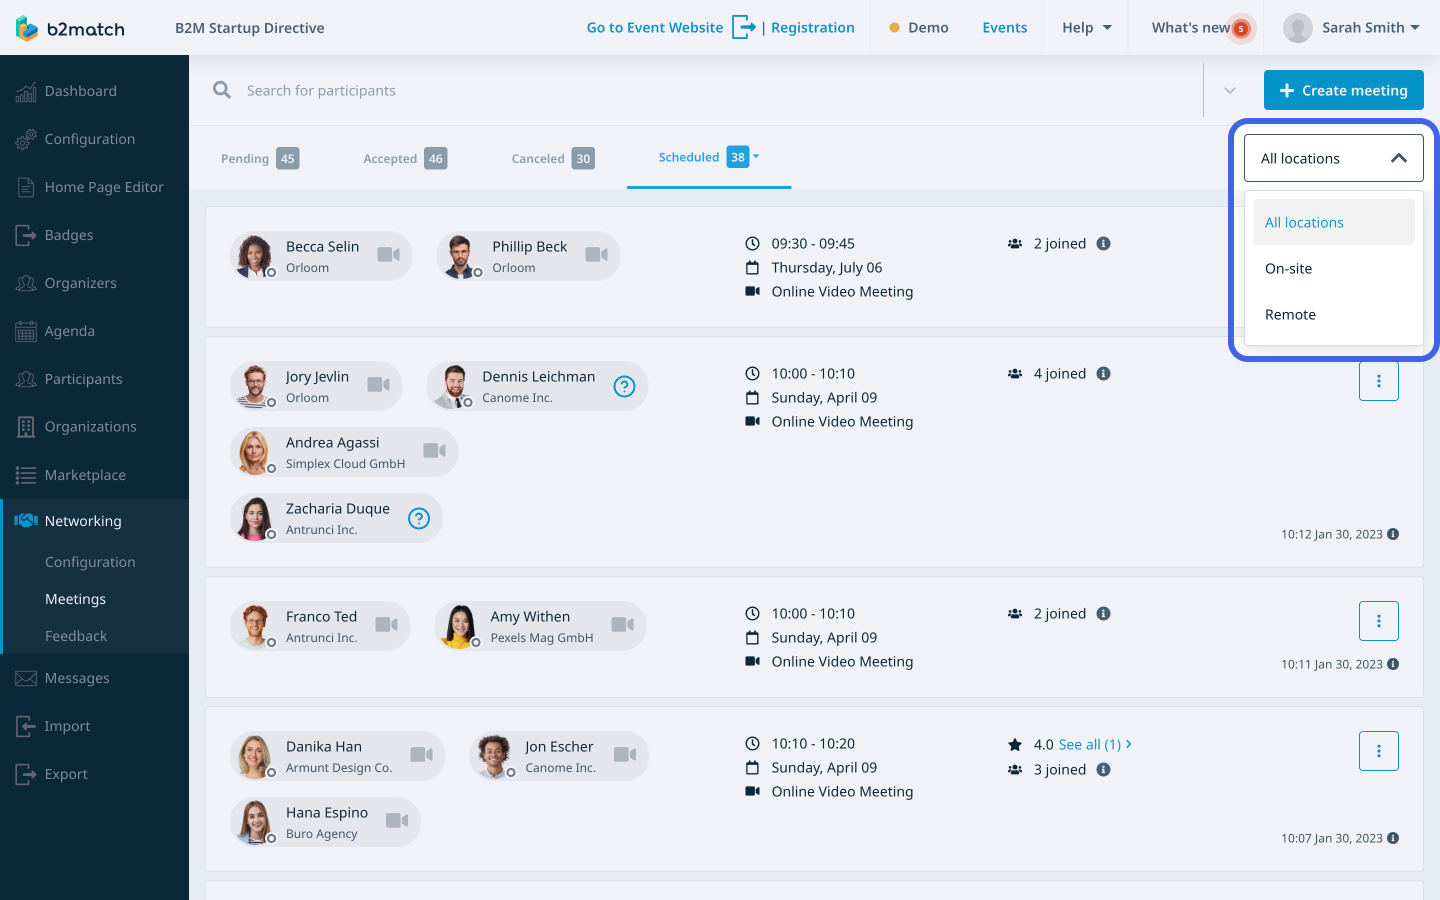
Under the Scheduled tab, you can find all accepted meetings that have scheduled times and locations. By clicking on Scheduled, you will reveal a drop-down menu with filtering options. These options allow you to filter meetings based on their status: past meetings, ongoing meetings (meetings now), and future meetings (next meetings).
In the upper right corner, you will see the All locations button. By clicking on this button, a drop-down menu will reveal, allowing you to filter meetings based on their location. You can choose from three options: All locations, On-site, and Remote.
Meeting cards
Meeting details are presented on the Meetings page through meeting cards.
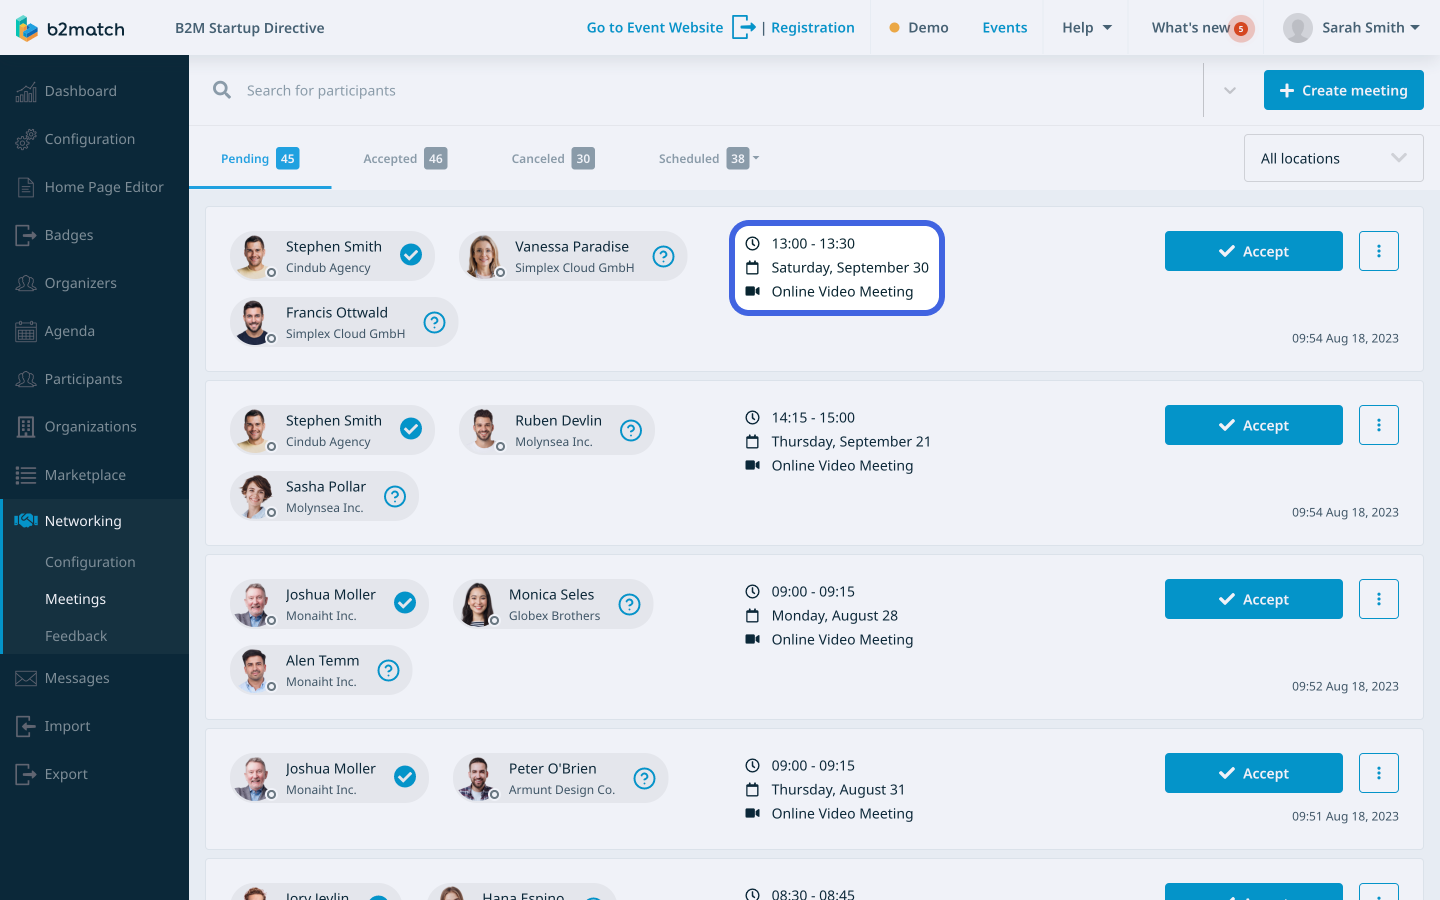
The meeting card will display the avatars and names of the participants invited to the meeting.
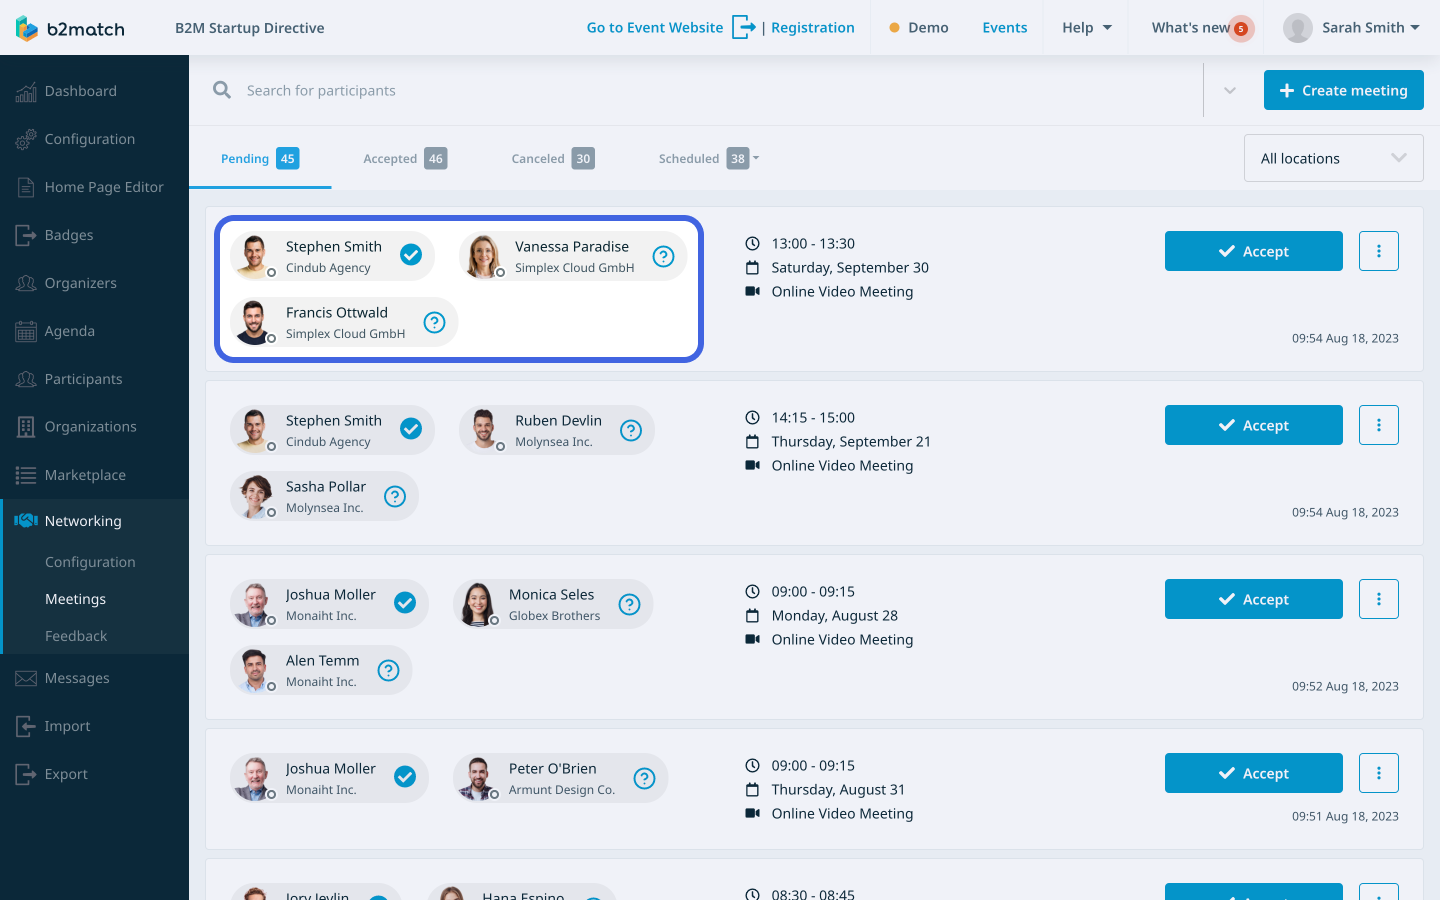
Additionally, here you can find the precise date and time of the meeting, along with the meeting location.
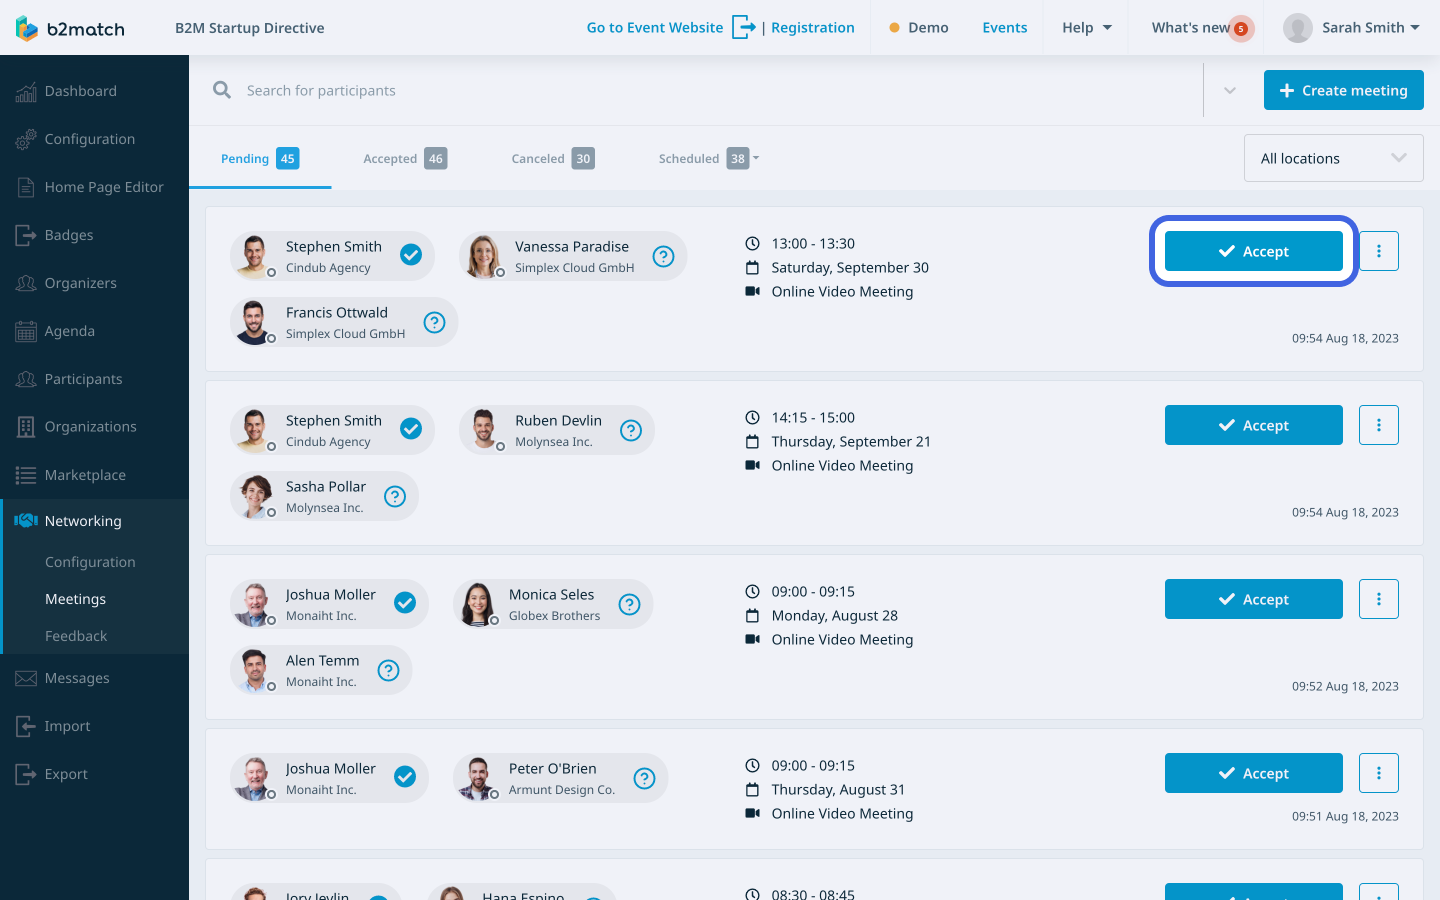
In the Pending tab, you will see the Accept button. Clicking on this button automatically confirms the meeting and shifts its card to the Accepted tab.
Within the Accepted tab, you'll find additional information about past meetings. This includes the count of registered participants who joined the meeting, meeting duration and the meeting ratings.
If you didn't find an answer to your questions, please get in touch with the Support Team here.