Editing Session SettingsUpdated 11 days ago
When it comes to organizing a successful event, configuring session settings is a critical step that shouldn't be overlooked. This is particularly important when it comes to registration, as you want to ensure that the right participants have access to your sessions.
Read on to learn what else you can edit in the session settings.
How to configure session settings?
Begin by clicking on Agenda located on the left sidebar.
From the list of all sessions, locate the one you want to configure and click on it. This will open the Session info sidebar.
In the Session info sidebar, navigate to the Settings tab.

Here you will see three session settings you can configure.
What can you configure in session settings?
Registration rules
By defining registration rules, you can control who is able to sign up for a session based on their participant type.
To set a rule, simply select the participant type(s) you want to allow access to your session.

You can also make your session visible only to those participant types that are allowed to register for it.
To do this, simply tick the Private session checkbox.
Limit the number of registrations
You have the option to limit the number of participants who can sign up for a session, thereby specifying the maximum number of attendees who can add the session to their schedule.
You can easily control this by clicking the toggle switch and entering the maximum number of participants allowed in the Limit field.

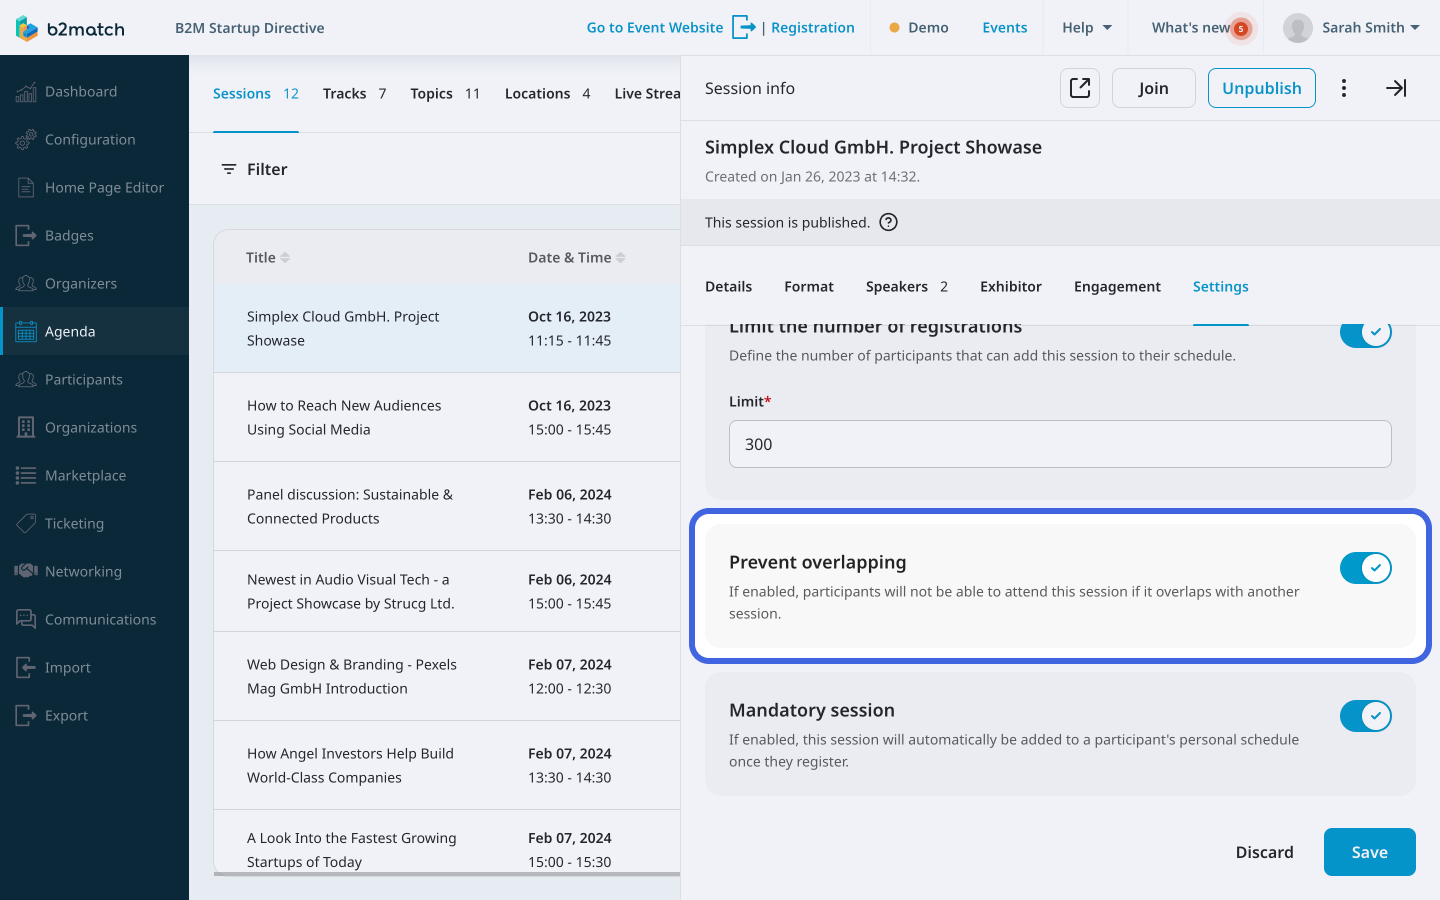
Prevent overlapping
Enabling the prevent overlapping feature ensures that attendees cannot sign up for a session if it overlaps with another session they've signed up for.
To enable this feature, simply click on the toggle switch.

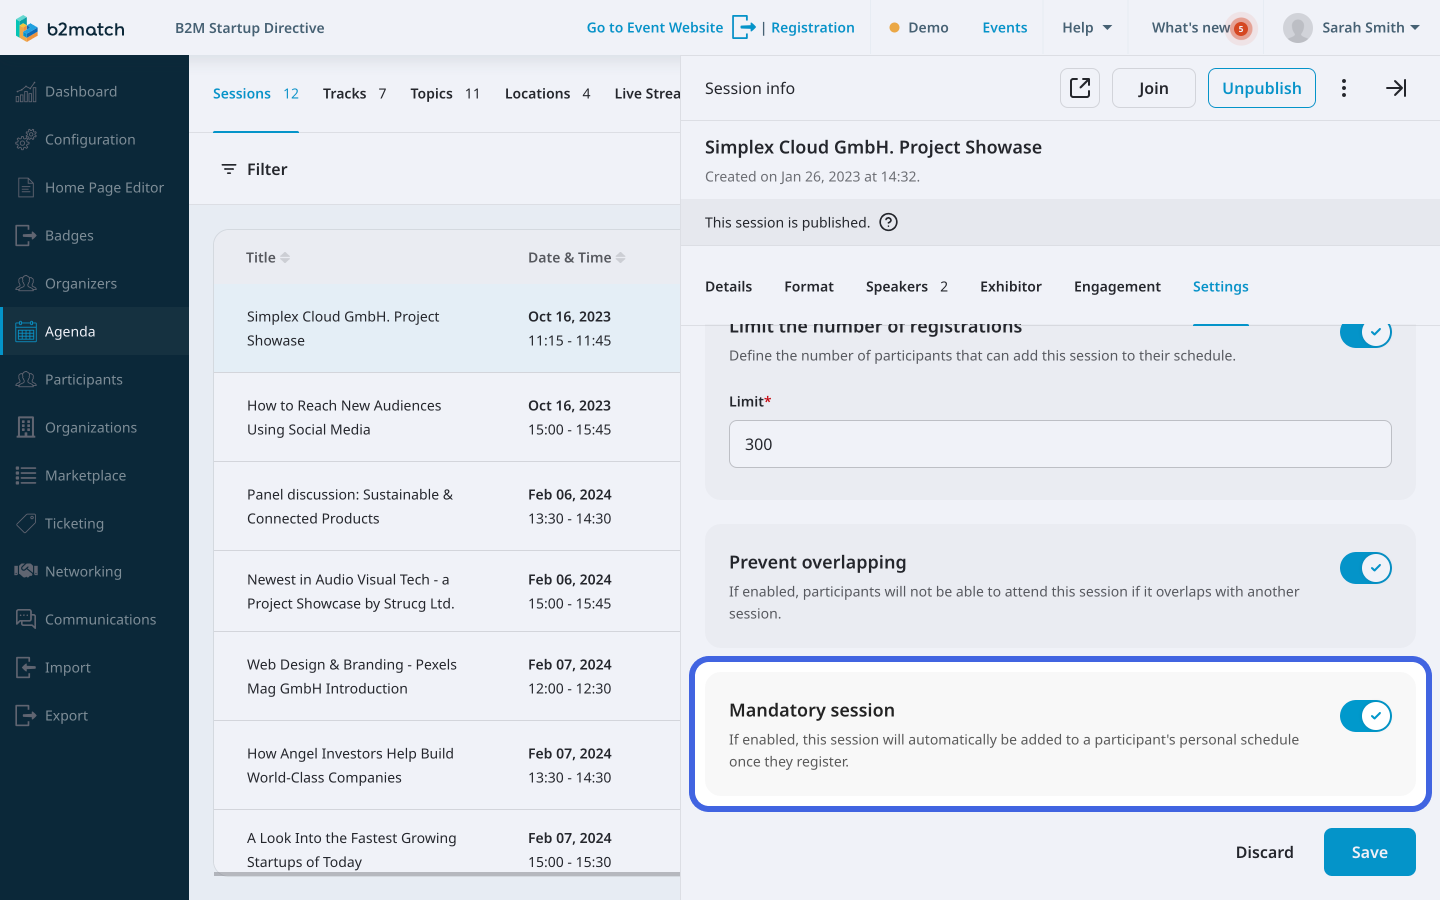
Mandatory Session
Enabling the mandatory session feature makes the session mandatory for every participant and is automatically added to a participant's personal schedule once they register for the event.
To enable this feature, simply click on the toggle switch.

If you didn't find an answer to your questions, please get in touch with the Support Team here.
