Integrated Video ConferencingUpdated 3 months ago
When configuring an agenda session, an essential step is choosing the session format. Is your agenda session an in-person session, a live stream, a pre-recorded session, or a video conference?
Refer to our article Configuring & Editing session format to find out which format is most suitable for the session you envisioned.
If you opt for a video conference session, b2match gives you two options at your disposal: an integrated video conferencing tool or an external video conferencing tool. In this article we will explain the integrated video conferencing tool on the b2match platform.
What is integrated video conferencing?
Integrated video conferencing is a solution that eliminates the need for additional downloads, installations, or extra accounts. It operates entirely within the browser. b2match employs Daily.co as its integrated video conferencing tool.
Daily.co general features list:
- A maximum of 200 participants per video call by default. If you have a larger audience, we suggest using our live stream feature.
- 100% browser operated
- Chat with the possibility to download a copy of the chat history as a text file
- Dual screen shares (only supported in Chrome)
- Screen sharing (best experience in Chrome)
Features dedicated to participants:
- Customizable view – speaker view and grid view
- Adjusting in-call quality – high quality, low quality, or no camera
- Checking the network quality and bandwidth in use
- Changing the participant’s displayed name
- Changing the language of the interface
- Screen sharing and chat
Features dedicated to organizers:
- Mute the camera/microphone of all participants
- Remove participants from the meeting
- Record the session
How can I join the conference as an organizer?
Organizers can also join the video conference session to monitor participants during a session.
To join the video conference, first click on Agenda on the left sidebar of the Organizer’s Tool.
In the Sessions tab, you will see an overview of all the sessions you created.

Click on the session you wish to join to open the Session info sidebar, and from here click on the Join button.

This will open the integrated video conferencing room.
Inside the conferencing room, you as the organizer can perform various actions that might help to monitor the session:
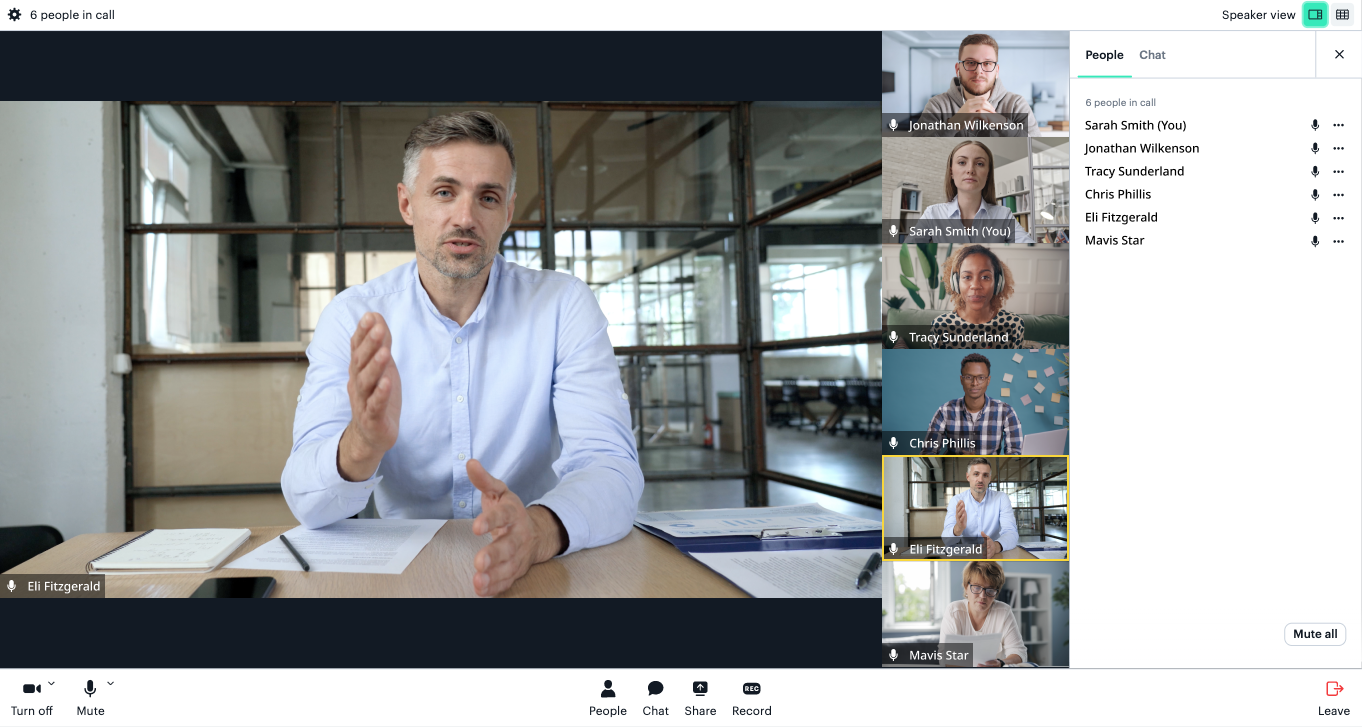
- Mute the participant – click on People in the bottom bar to open the People side panel. To mute a participant, simply click on the 3 dots next to their name and from the drop-down menu select mute microphone
- Turn off the participant’s camera – click on the 3 dots next to their name in the People side panel and click on turn off camera
- Pin the participant to the main window - click on the 3 dots next to their name in the People side panel and click on pin participant
- Remove the participant from the meeting - click on the 3 dots next to their name in the People side panel and click on remove from call
- Muting all participants with the Mute all button – click on the Mute all button in the bottom right corner of the People side panel

What does integrated video conferencing look like for participants?
The participants can join the session through the event agenda or the “My schedule” page on the event website by clicking on the Join now button. The button will become active 10 minutes before the session starts and will remain active until the end of the session, meaning participants can enter the session room 10 minutes before the session starts.

Session settings
Your participants can configure their session preferences by clicking the Settings icon in the upper left corner.
This will open the Settings modal window.
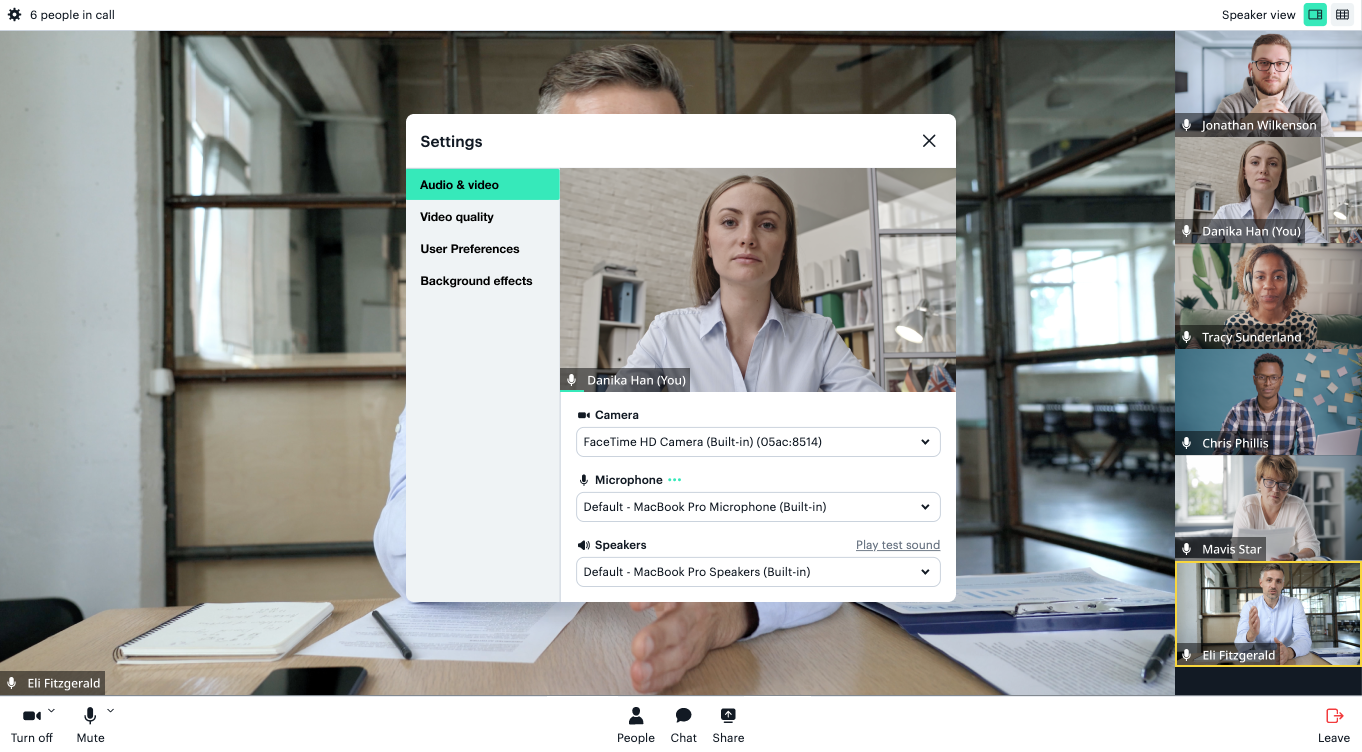
In the Audio & video section, participants can change their camera, microphone, speakers, and enable noise reduction.
In the Video quality section, they can adjust the video quality settings that are based on their internet connection. They can choose between Auto, high quality, low quality, or bandwidth saver.
In the User preferences section, participants can change the language of the interface and customize their chat notifications. They can choose if they want to receive notifications when the chat is closed, always, or never.
In the Background effects section, participants can blur their background, change it to a predefined one, or even upload a custom background image from their PC.
Bottom bar
The bottom bar offers quick actions participants can perform.
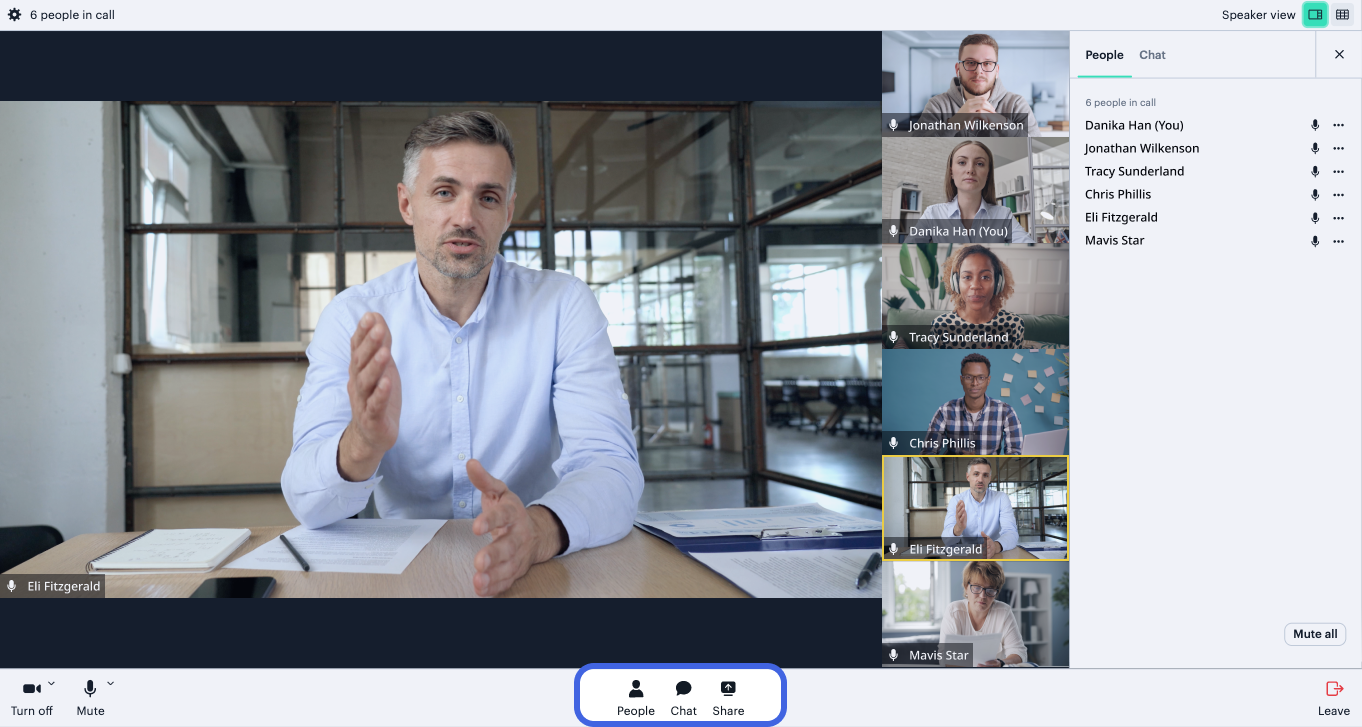
Here, participants can turn off or turn on their camera or mute and unmute their microphone.
By clicking on the People icon, the sidebar panel will open, listing all participants that are attending the session.
By clicking on the Chat icon, the sidebar panel will open the chat. Participants can here engage with other session attendees. However, there is a character limit of 256 per message.
By clicking on Share, participants can share their screen to other participants.
The participants can personalize their view by opting for the Speaker view or the Grid view in the upper right corner.

The Speaker view will display a magnified view of the person speaking (or the last person who was speaking), while the Grid view will display up to 25 participants in a grid.
How can I record a session?
You as the organizer can easily record sessions and download the recording afterwards.
To record a session, first you will have to join the session as an organizer through the Organizer’s tool by clicking the Join button.
To start recording click on the Record button at the bottom of the screen. The button will only be visible to you, or other organizers who also joined the session through the Organizer’s Tool.

Once you stop the recording, the video will immediately be available in the Organizer’s Tool, in the Recordings tab.
Note: Keep in mind that if you leave the session, the recording will continue until the last participant leaves the session.
To download the recording, click on Agenda, and then navigate to the Recordings tab.
Here, you will find all your recordings. The video format is .mp4.
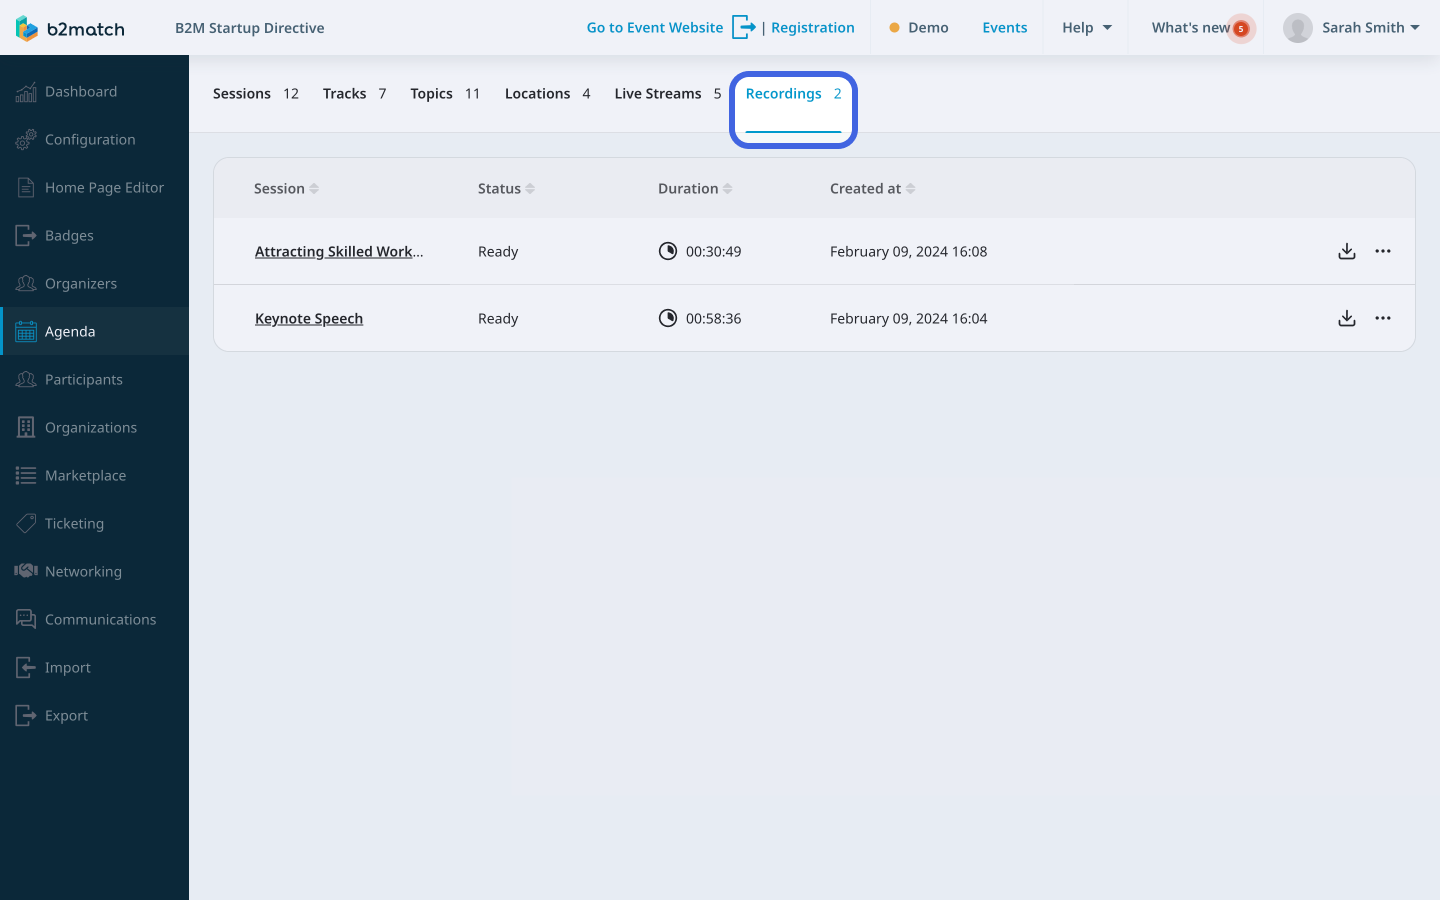
To delete a recording, simply click on the 3 buttons next to the recording, and from the drop-down menu, select Delete recording.

This will trigger the Delete recording modal asking you for confirmation. To delete the recording, click Yes, delete.
How can I track participants' online attendance?
For getting more control and a better overview of your participants’ engagement on your event, you can even track your participants online attendance.
Go to the Participants list by clicking on Participants on the left sidebar of the Organizer’s tool, and click on the Advanced search button.
Then go to the Attended Online Sessions section and tick the sessions you are interested in.

Click on Search at the bottom of the page to get a list of participants that match the filter.
You can also download the list of participants who attended online sessions as a PDF document.
First, click on Export on the left sidebar of the Organizer’s tool. Then from the Excel Documents section, locate Attended Online Sessions, and click on the Prepare button next to it.
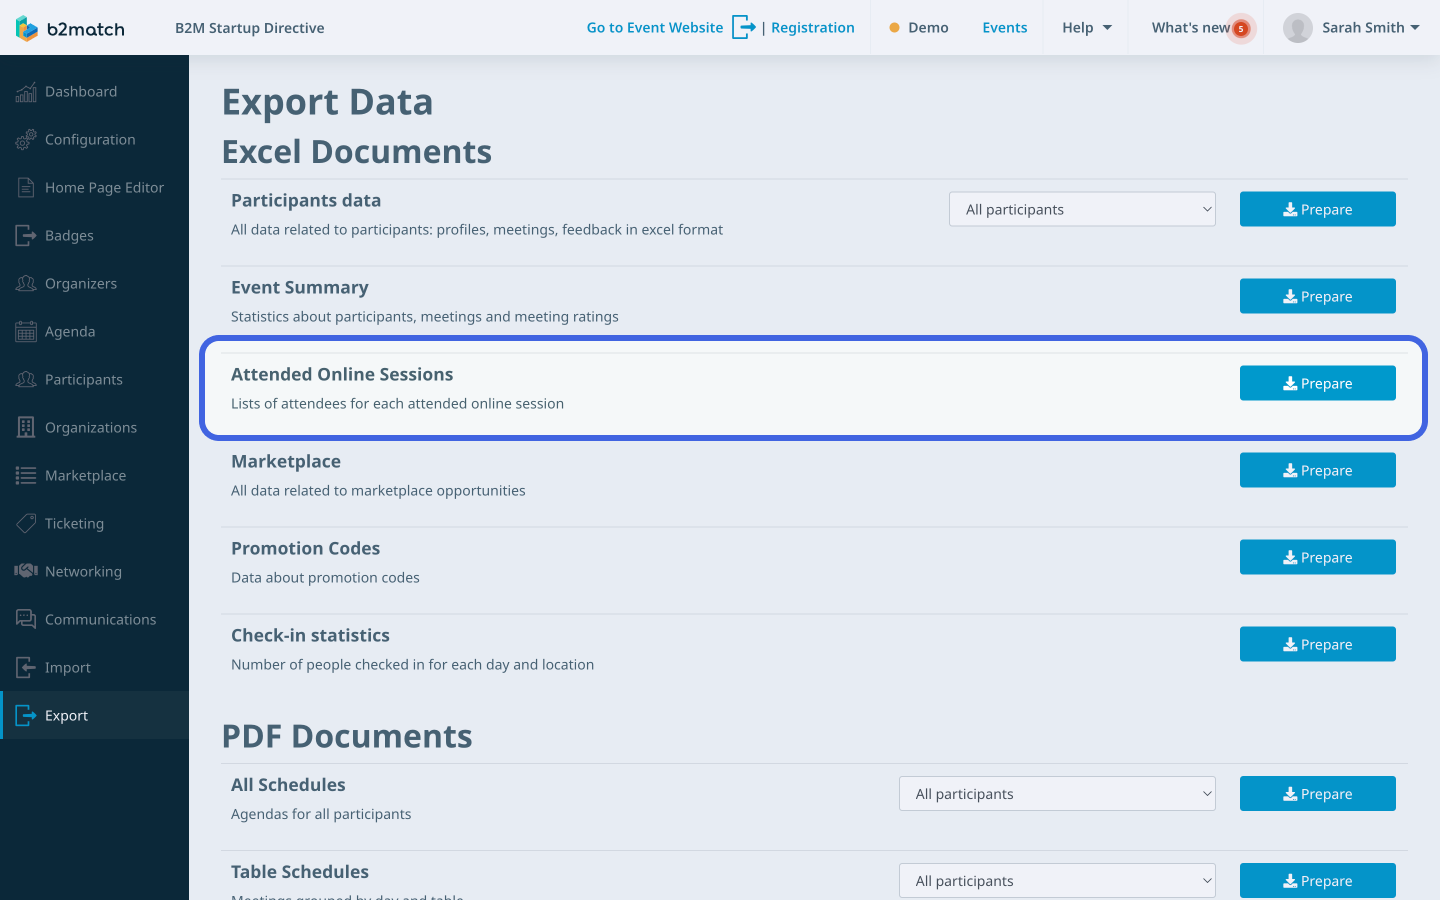
After the system prepares the system, you will notice the Prepare button has turned green and now displays Download.
Click now on the Download button to download the excel document with a list of attendees for each attended online session.
If you didn't find an answer to your questions, please get in touch with the Support Team here.