Setting Up Your Meeting AvailabilityUpdated 3 months ago
Before you attend meetings on the b2match platform, you should specify at which time you are available for meetings with other participants.
How can you do that?
Read further to learn more about setting your availability for meetings.
What is my meeting availability?
Your meeting availability shows the time slots during which you are available for meetings.
By default, you are set as available for meetings, and all meeting blocks that the organizer has created will automatically be added to your availability as you register for the event.
However, you have the flexibility to set your availability by removing specific time slots or entire meeting blocks if you wish to indicate you are unavailable during that time.
Following this, it's important to manually select the time slots when you are open for meetings. This helps in scheduling meetings, because the platform recognizes which participants are free at which time, and finds the first time slot when all participants you want to meet with are available.
If the organizer creates new meeting blocks after your registration, these will not automatically be added to your availability unless the organizer configures it. In such cases, you will need to manually select the available time slots from the newly created meeting blocks.
Read more about sending and receiving meeting requests in our article Requesting meetings.
How can I set my availability?
There are two places where you can set your meeting availability.
Set availability from the Meetings page
Access the Meetings page by clicking on the meetings icon in the navigation bar. In the upper right corner, under your avatar, click on Availability.
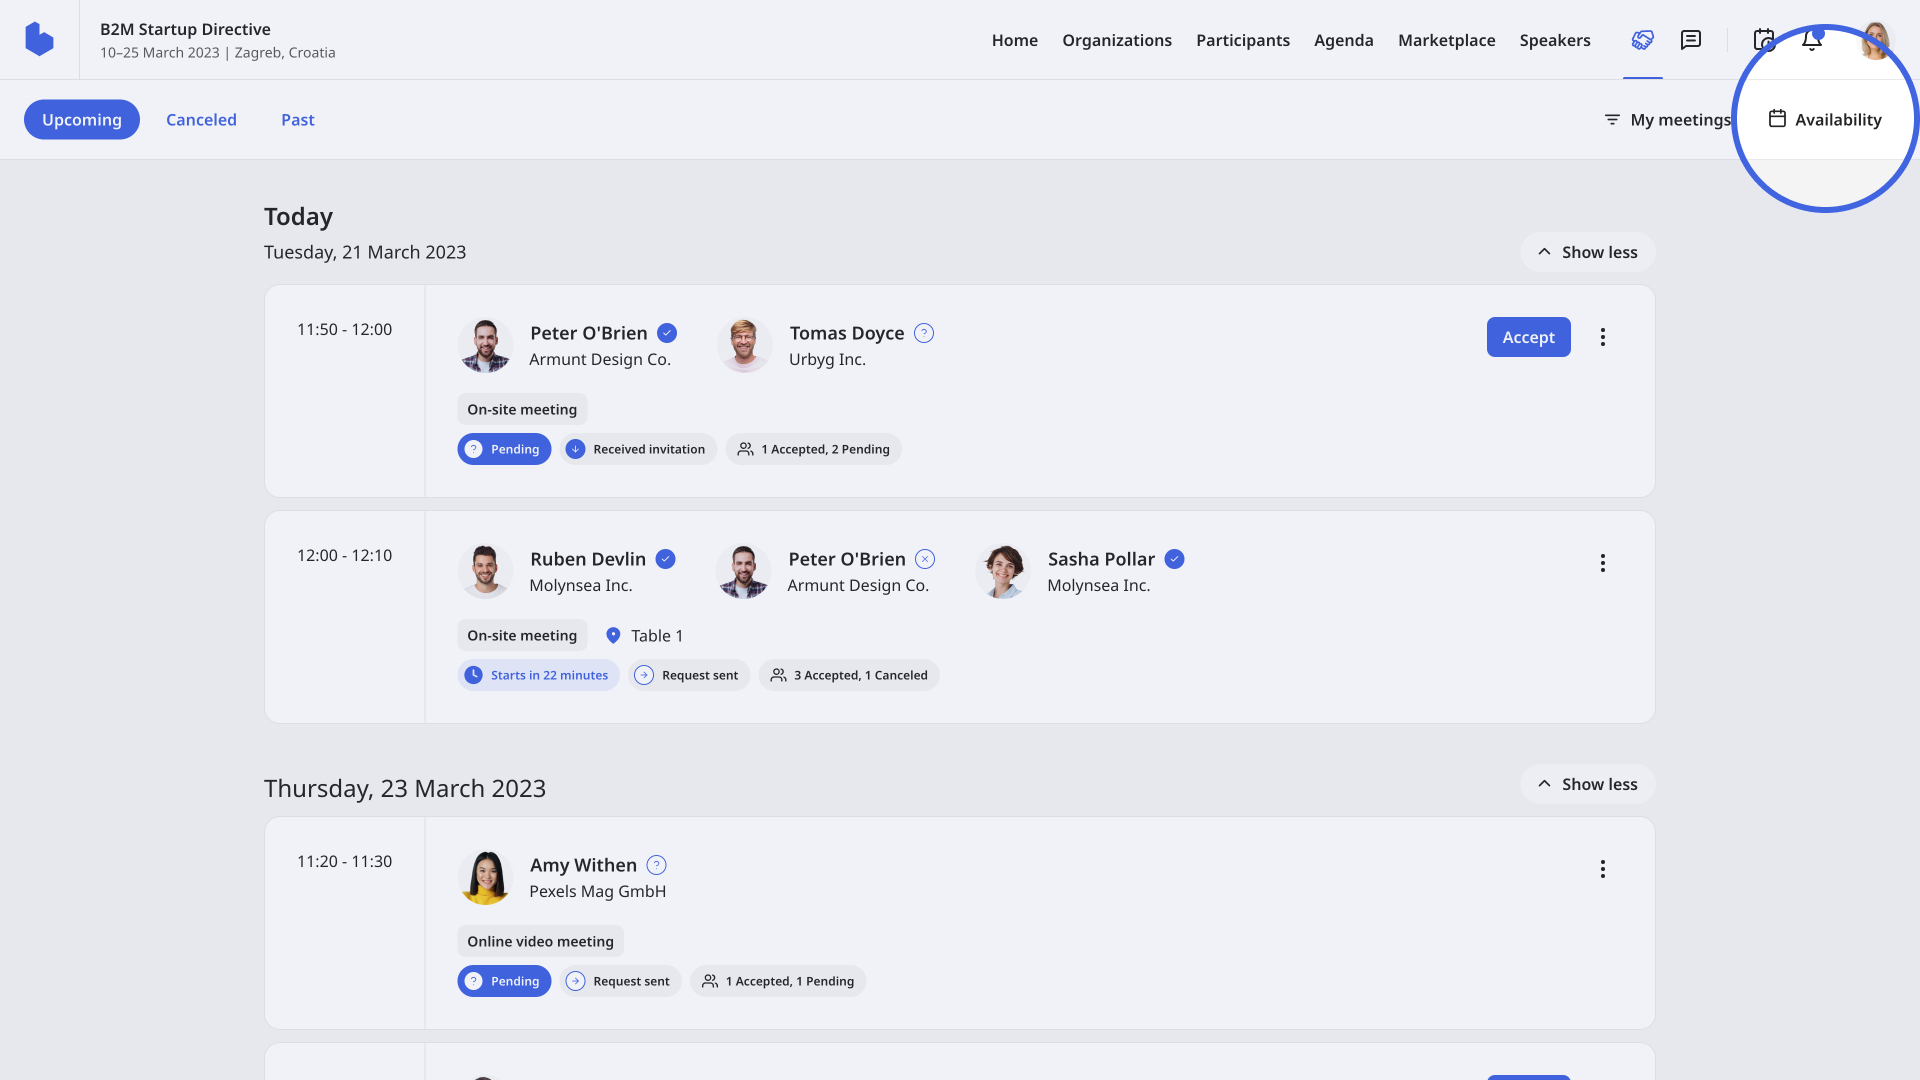
After that, the Availability modal will open.
First, it is important to make yourself available for meetings. You can do that by clicking on the toggle button.
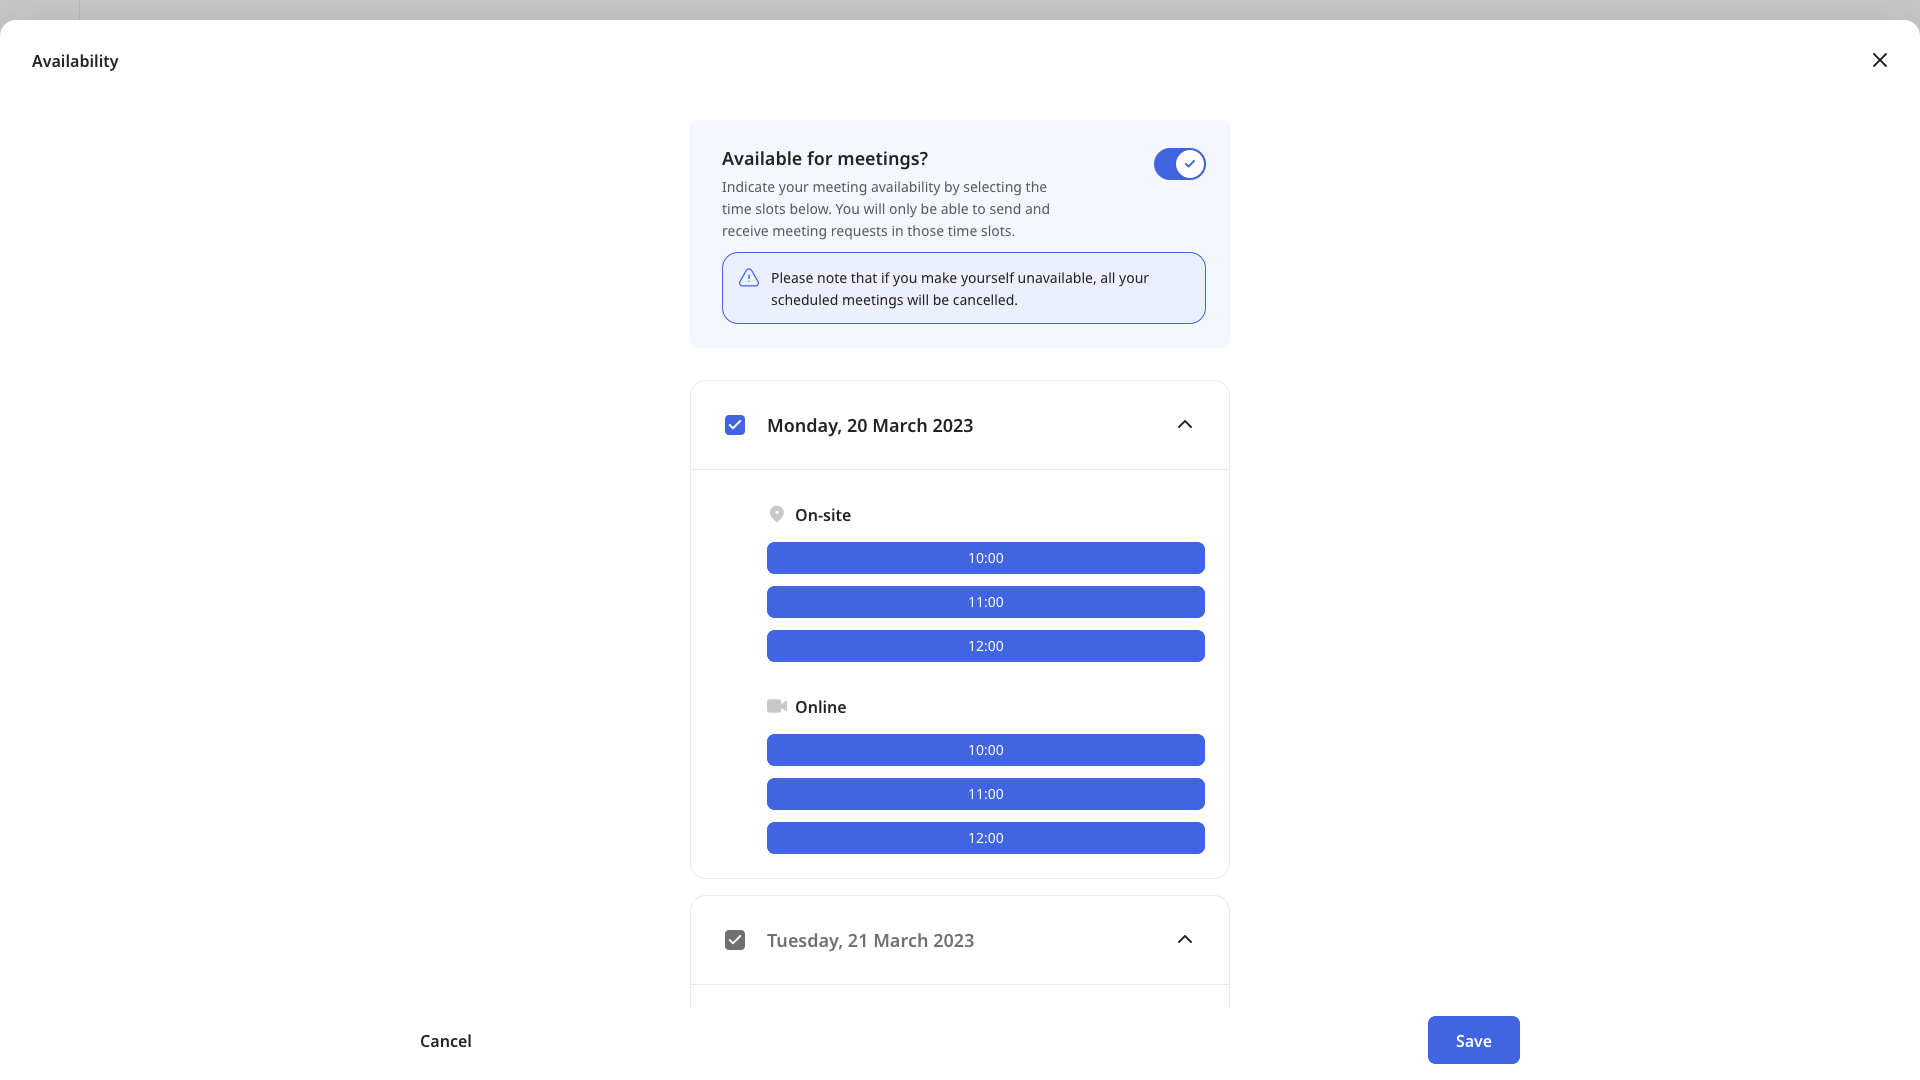
Next, tick the boxes next to the dates you’re available for meetings.
After that, click on Save to save your meeting availability time slots.
Set availability from your Dashboard
Open your dashboard from the drop-down menu by clicking on your avatar. Here, find the Book meetings section and click on the My availability button to open the Availability modal.
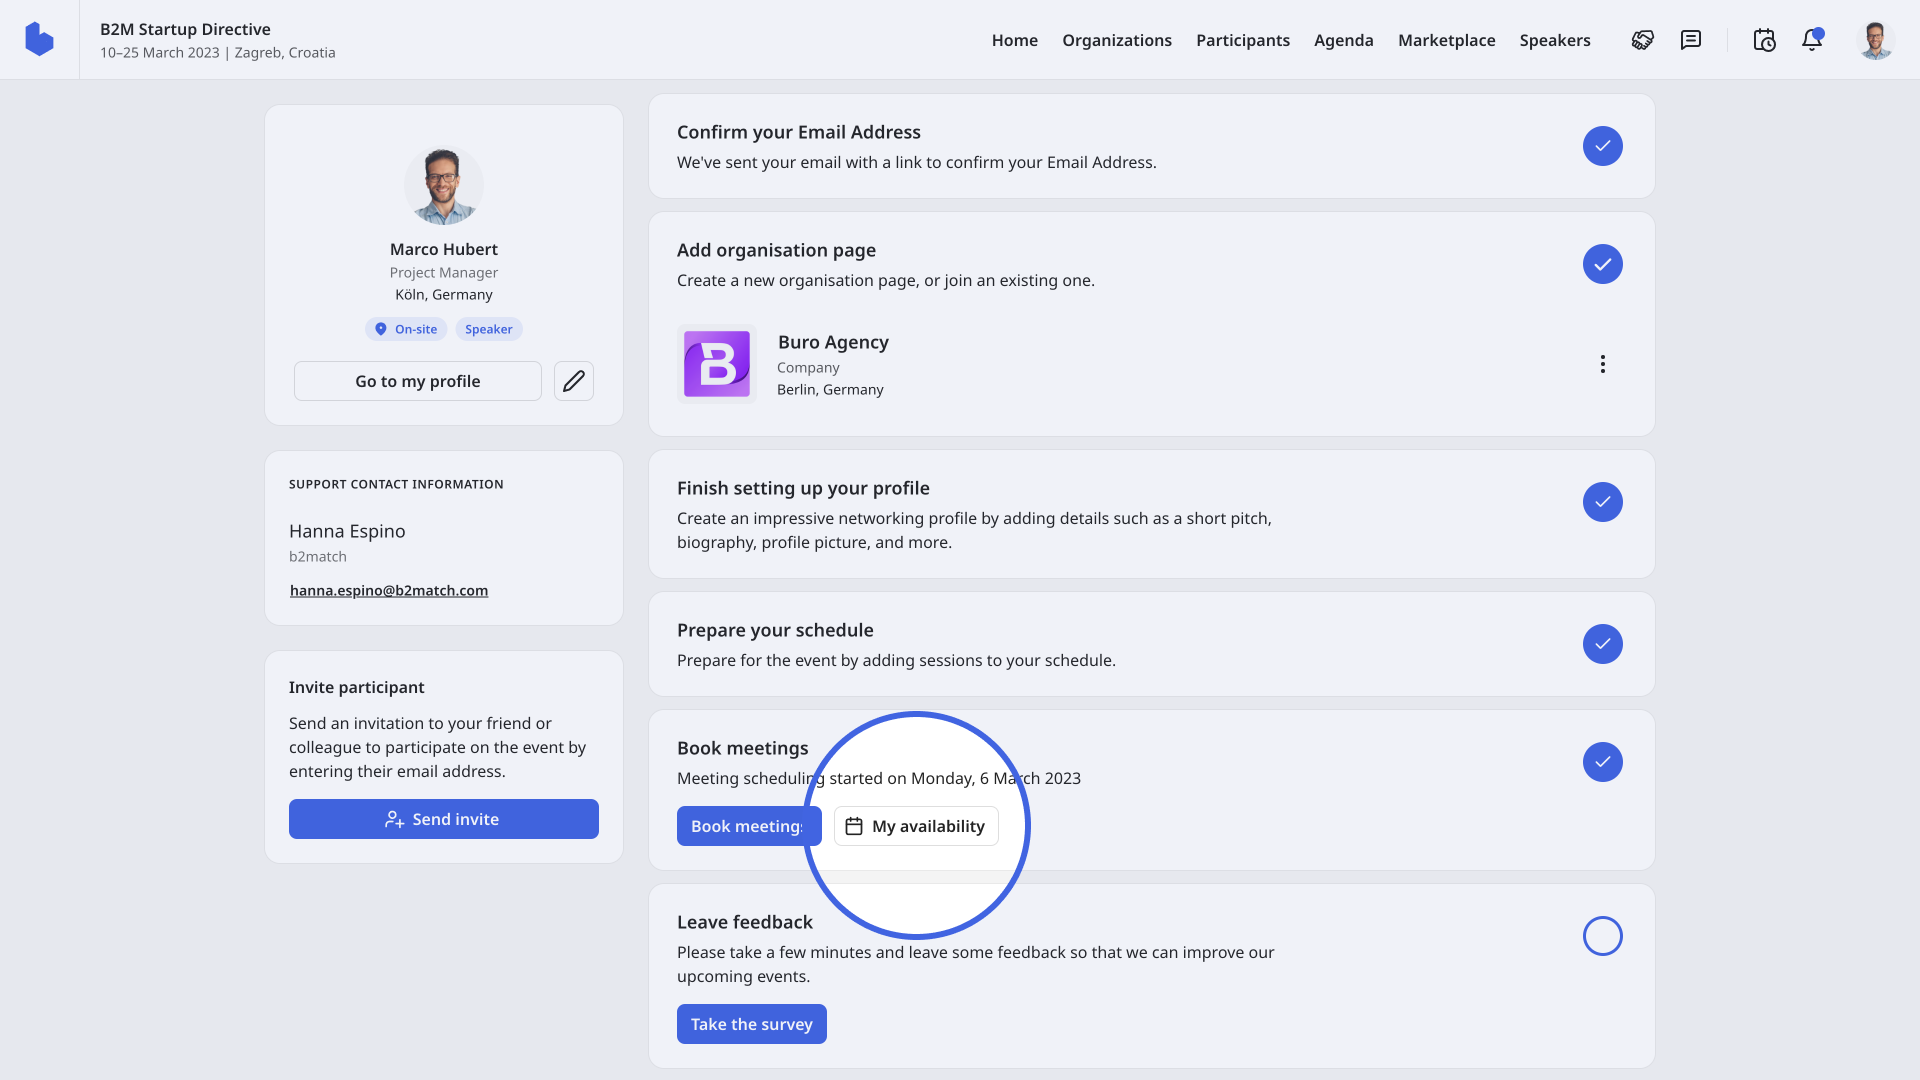
In the Availability modal, select your available time slots.
If you didn't find an answer to your questions, please get in touch with the Support Team here.